Coinciding with the highly-awaited release of Modern Warfare 2, Call of Duty‘s free-to-play battle royale game Warzone gets a solid makeover with a brand new map, Al Mazrah.
Departing from the tropical breeze of Caldera, Warzone 2.0 now embraces the desert heat of Al Mazrah, located in the fictional republic of Adal. With new towns, landmarks, and stone ruins in place, players will have brand new locations to learn.
Some of these locations are also maps in Modern Warfare 2, so those who already dabbled in multiplayer should find them quite familiar.
Here’s a quick guide on all the locations you need to know in new Warzone 2 map, Al Mazrah.
A guide to the new Warzone 2 map and its POIs
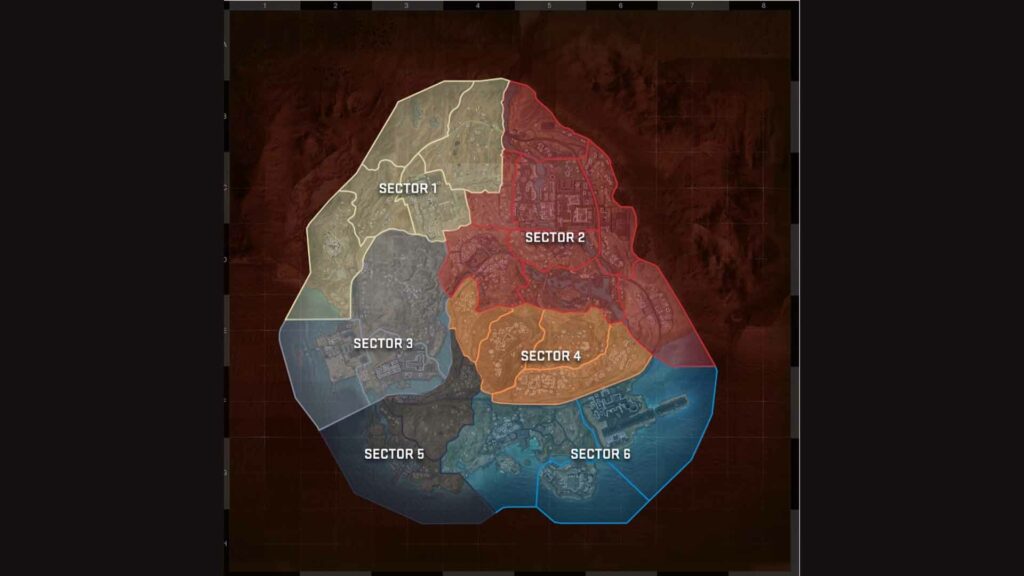
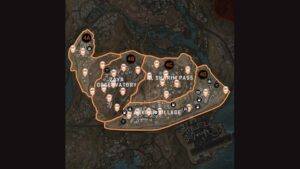
Sector 1: Al Mazrah Northwest
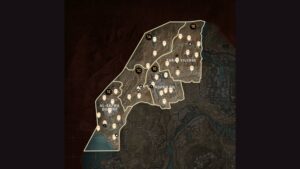


- Zone 1A: Oasis
- Zone 1B: Taraq Village
- Zone 1C: Western Foothills
- Zone 1D: Rohan Oil Refinery
- Zone 1E: Al Safwa Quarry
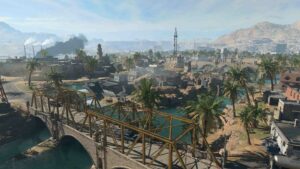
In the northwest region of Al Mazrah, players will find a sprawling landscape of oases, roadside ruins, and three major locations: Taraq Village, Rohan Oil Refinery, and Al-Safwa Quarry.
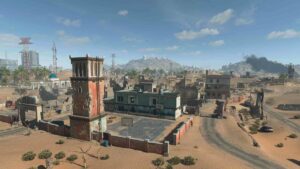
Taraq Village looks to be the safest place to drop, loot, and hole out for a quick ambush. The POI has plenty of structures that provide you with cover, vantage points, and hiding spots.
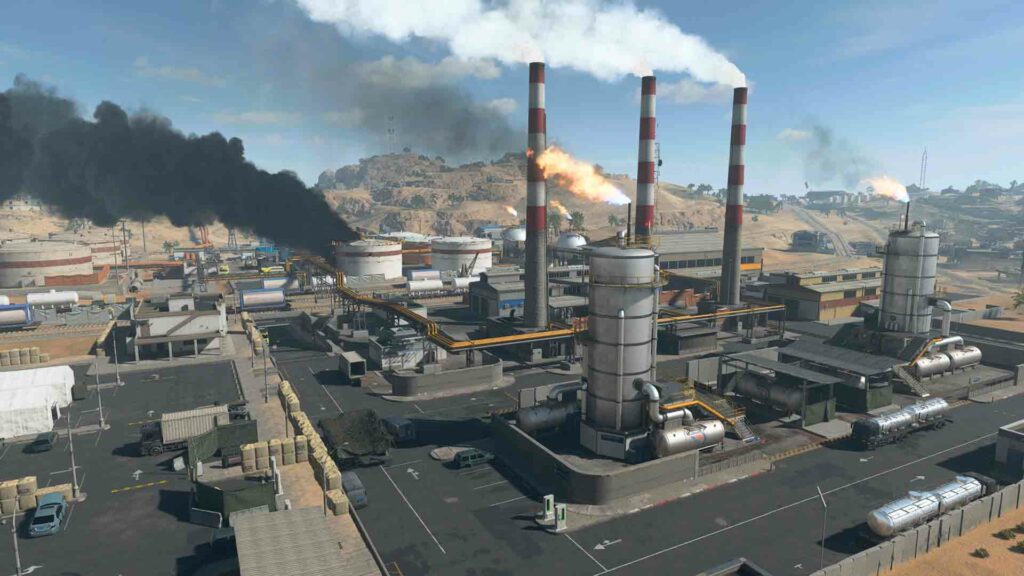
If you’re looking for quick loot and fast fights, Rohan Oil is the place to be. The oil complex is primarily an open area with tents and worker housing on the sides. Opponents can climb up the numerous silos and tanks so always keep an eye out for trigger-happy snipers.
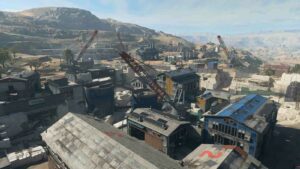
Similar to Rohan Oil, the Al Safwa Quarry is a vast industrial complex nestled deep in the western foothills of Al Mazrah. If you’re looking to get a nice vantage point for enemies in the open, it’d be best to land in the Upper Mountain Compound. However, your best bet for loot would be right in the middle of the complex where the cranes and factories are.
Sector 2: Al Mazrah Northeast
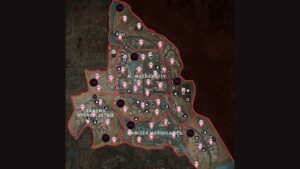


- Zone 2A: North Industrial
- Zone 2B: Western Outskirts
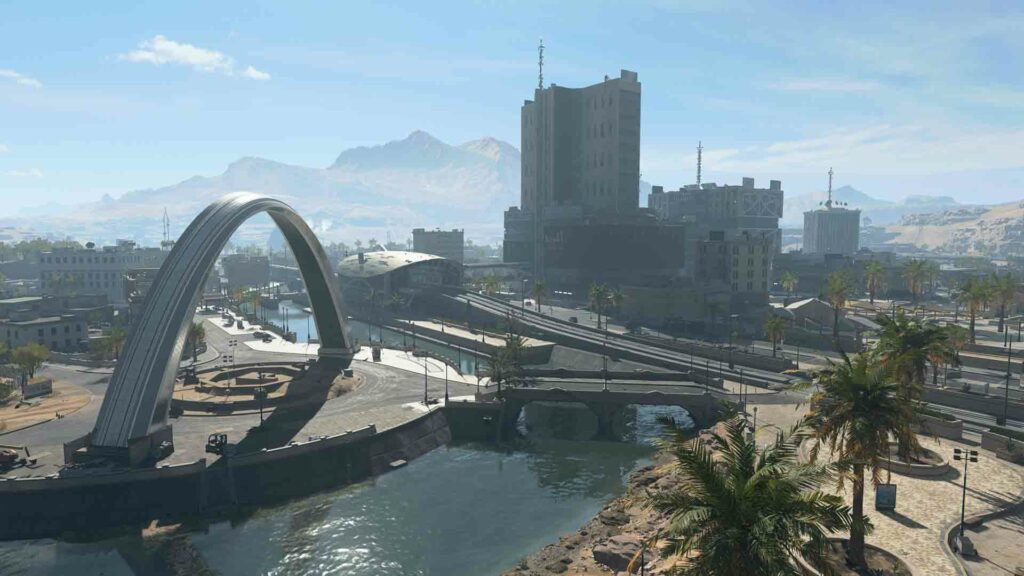
- Zone 2C: Al Mazrah City
- Zone 2D: Eastern Outskirts
- Zone 2E: Southern Outskirts
- Zone 2F: Zarqwa Hydroelectric
- Zone 2G: Mawizeh Marshlands
- Zone 2H: East Suburbs
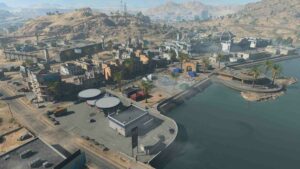
Sector 2 features the map’s dense metropolitan district, Al Mazrah City. You can expect a plethora of buildings that you can explore, including a police station, highrise buildings, and even an embassy, potentially making it the map’s biggest hot drop.
If the bustle of city life isn’t for you, you can head over down to the East Suburbs, where you might have a quainter looting spree. The location is home to a market, a strip mall, and a freeway that cuts through the whole town.
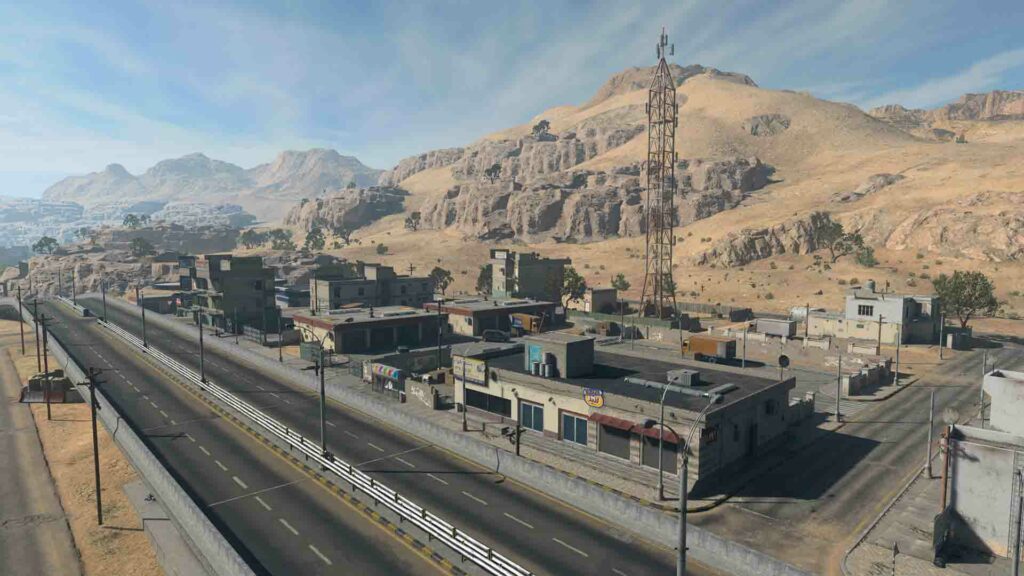
Zarqwa Hydroelectric is another important location that you need to know for map rotations. The village has a handful of historical landmarks, housing complexes, and industrial buildings. Since Zarqwa’s near the middle of the map, you can expect straggling Operators and squads to eventually make their way here once the ring closes.
Sector 3: Al Mazrah West


- Zone 3A: Sattiq Cave Complex
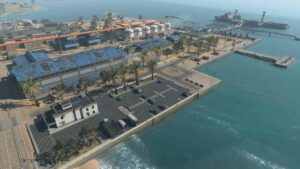
- Zone 3B: Hafid Port
- Zone 3C: Sa’id City
The west sector’s crown jewel is a deep network of underground hideouts right under the town of Sattiq. The Sattiq Cave Complex is a great place to sit tight and catch out opponents unfamiliar with the location’s maze-like structure.
While the exterior of the Sattiq Cave Complex is mostly composed of rundown villages and outposts, players can visit the more established coastal locations of Hafid Port and Sa’id City. Some key landmarks here include the Oil Jetty in Hafid Port and the Soccer Stadium in Sa’id City.
- All new Operator skins coming to Warzone 2.0 and Modern Warfare 2 in Season 1
- The best items to unlock first in Warzone 2.0 and Modern Warfare 2 Season 1 battle pass
Sector 4: Al Mazrah Zaya Observatory and Mountains


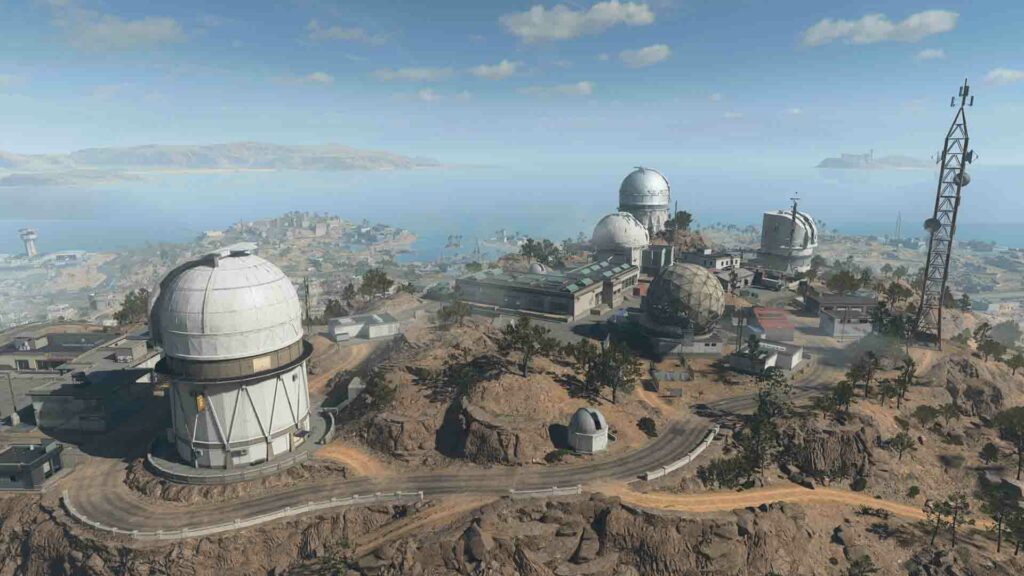


- Zone 4A: Northwest Mountain
- Zone 4B: Zaya Observatory
- Zone 4C: Al Sharim Pass
- Zone 4D: Ahkdar Village
Sector 4 is a difficult location to drop at since it’s sandwiched between four other sectors. As soon as the circle closes, you should expect many players to pass through this sector.
Despite being a mid-game hot spot, players can find solid positions at either the Zaya Observatory or Ahkdar Village.
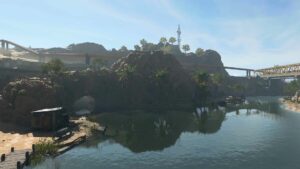
As the highest point of Al Mazrah, the Observatory gives a great vantage point over the entire map. Once you’ve cleared this place out of initial drop-ins, your opponents will have quite the journey to reach the location’s main hub. We’re talking zig-zag roads, bridges, and craggy terrain.
When in Ahkdar Village, you’re bound to be captivated by the sights. The world heritage site consists of a central courtyard, a grand bazaar, and modern apartments. With the POI having tight alleyways and labyrinthic buildings, squads are in for close-range firefights here.
Sector 5: Al Mazrah Southwest
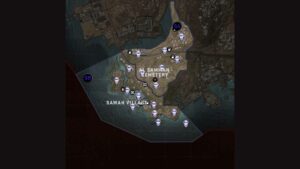


- Zone 5A: El Samman Cemetery
- Zone 5B: Sawah Village
With only two major landmarks, Sector 5 is the perfect location for those who want to avoid fights and play the long game.
The walled El Samman Cemetery can be treated as the initial drop for the southwest region. From this derelict place, you have access to other residential structures in every direction for extra looting.
Just south of the Cemetery, you’ll find the sunken Sawah Village. Al Mazrah’s very own Atlantis, Sawah is home to a few unique landmarks, such as the Covered Market and the beached Oil Tanker.
Sector 6: Al Mazrah South
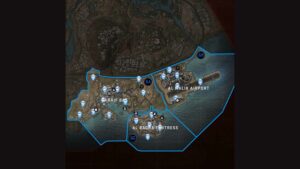


- Zone 6A: Sarrif Bay
- Zone 6B: Al Malik Airport
- Zone 6C: Al Bagra Fortress
Similar to sectors 3 and 5, the southern region is home to three coastal locations: Sarrif Bay, Al Bagra Fortress, and Al Malik Airport.
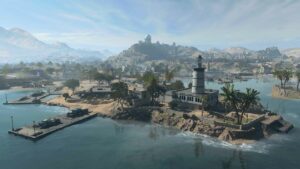
While it does have the usual inland district of residential buildings and gas stations, Sarrif Bay has its own Lighthouse Peninsula, Eastern Fishing Bay, and Resort. With swimming now being a mechanic in Warzone 2, you and your squad can take a dip and observe your enemies from the coast.
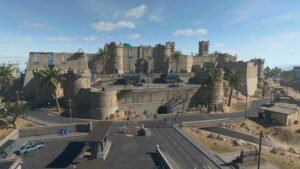
Al Bagra Fortress is a walled island city situated just southeast of Sarrif Bay. A single roadway by the Bridge and Cistern Entrance leads to it, but it looks like you can also swim your way onto the island’s shores.
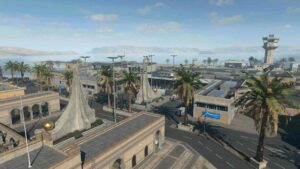
Al Malik Airport sees more modern architecture, with multi-story parking lots, warehouses, an airport terminal, and a control tower. When you’re looting, it’d be best to stay away from the long dilapidated runway, the most open area in the entire POI.
Learn more about Warzone 2 with this guide on the new circle mechanic.
Follow ONE Esports on Facebook and Twitter for more CoD news, guides, and stories.
READ MORE: What is DMZ? Warzone 2.0’s new mode detailed