Updated on June 24, 1:36 p.m. (GMT+8): Improved relevancy.
Valorant’s eighth map, Pearl, has multiple corridors, tight corners, and sprawling mid area that opens up a lot of room for greater strategic depth.
If you’re trying to figure out how to defend on the map, you can’t really go wrong with Sage, one of the most reliable sentinels in Valorant. She continues to be one of the most-selected agents in Valorant.
Seeing as how Pearl’s spike sites have several openings and exits, defenders can block off routes for attackers and create choke points using Sage’s Barrier Orb, which can deter or delay a push onto site.
3 best defenders’ side Sage walls on Pearl
Screenshot by Nigel Zalamea/ONE Esports
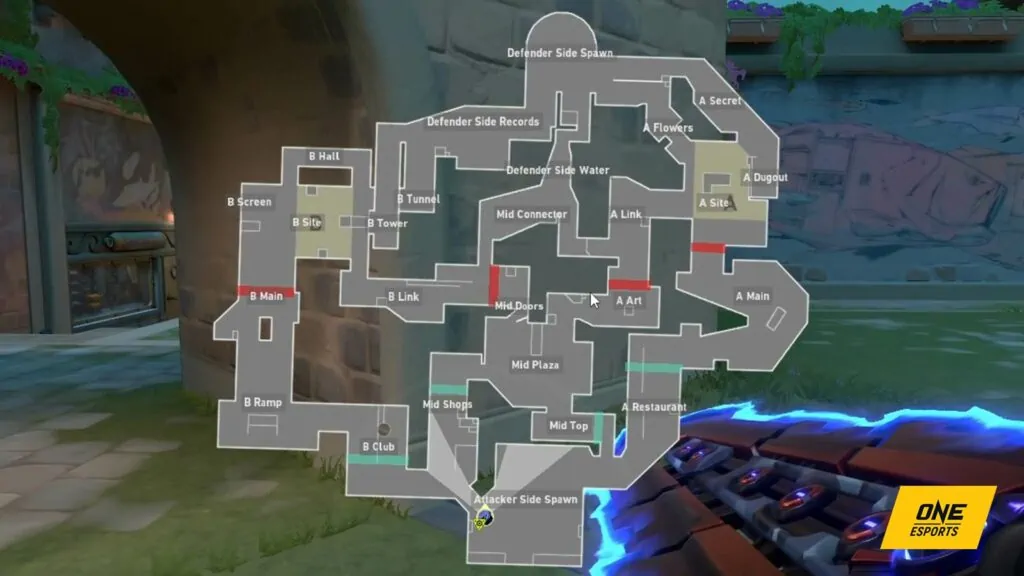
The first thing you need to keep in mind is that the map is split into three lanes: attacker side, mid, and B side. Cutting off access to one lane will allow defenders to focus their attention and utilities on the other sections of the map.
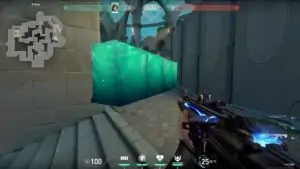
A Main

Screenshot by Nigel Zalamea/ONE Esports

Screenshot by Nigel Zalamea/ONE Esports
The A site has three entryways: A Main, A Link, and defender side spawn. By walling off A Main, defenders can delay attackers who are rushing the A site.
Preventing access from A Main will also allow defenders to focus on holding A Link, a fairly narrow choke point.
There are two spots to place the Sage wall in A Main: before the ultimate orb, or after it. Walling before the ultimate orb is a lot safer, since there is more distance between you and the attackers, which means they won’t be able to stop the Sage Barrier Orb from going up.
You can wall past the ultimate orb in order to secure it, but this is riskier. If the attackers have agents like Neon with movement abilities, they could easily contest the position or catch you off guard as you’re setting down the wall.
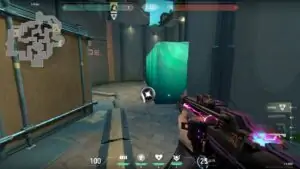
Mid Doors
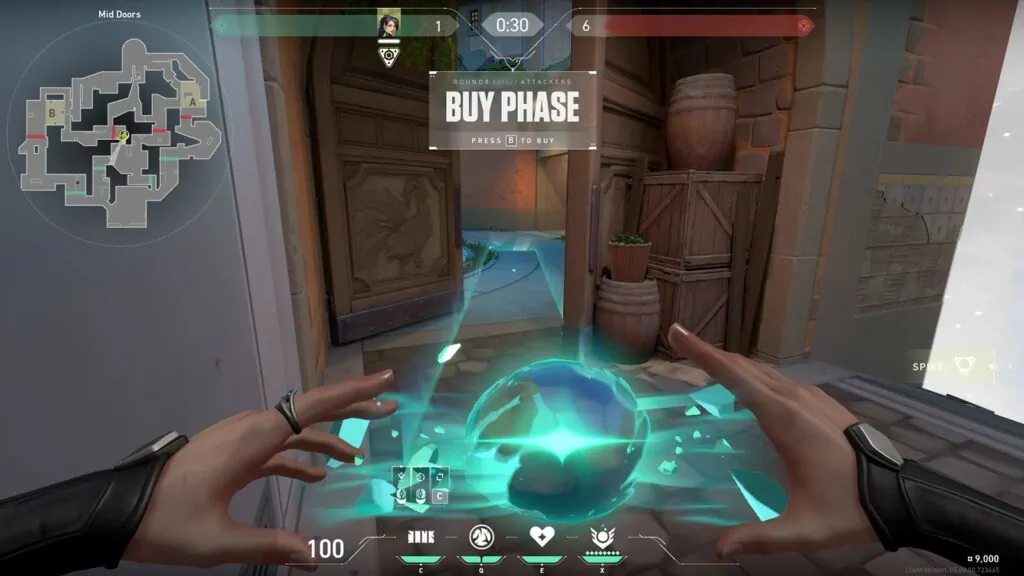
Screenshot by Nigel Zalamea/ONE Esports
Pearl’s mid section is filled with narrow passages that attackers can exploit.
Walling off Mid Doors will prevent attackers from entering B Link and Mid Connector and deny key rotations, allowing defenders to hold B Main more easily.
As on Split, Mid control on Pearl will likely be integral to winning rounds, which means that Sage will prove vital in the battle to control the various lanes in Mid.
B Screen

Screenshot by Nigel Zalamea/ONE Esports
B Hall and B Ramp provide plenty of space for both teams to have long-range gunfights, reminiscent of de_dust2’s A Long in CS:GO.
Placing a Sage wall on B Screen will prevent attackers from entering the B site from B Main. And since there are plenty of defensive spots to hold on the spike site, such as from behind cover at B Hall, defenders can peek through the gaps in the walls to pick off unsuspecting attackers.
READ MORE: Valorant Pearl map callouts and locations you should know