
Updated on May 17, 11:34 a.m. (GMT+8): Added relevant guides.
Like Haven, Valorant’s ninth map, Lotus, has three spike sites, giving attackers more targets to choose from.
Defending can be a challenge since the map is relatively big, and rotations will take longer and have an additional layer of complexity compared to traditional two-site maps.

To fend off attacks, you can use these simple Sage walls to slow down your opponents, giving your teammates enough time to rotate and even flank your opponents.
3 best defenders’ side Sage walls on Lotus
As the Sage player on your team, you should tell your fellow defenders which site you plan to wall off at the start of each round. This will relieve the pressure on your site, freeing the rest of your team to defend other areas on the map.
Your teammates can even push out of their sites, but they should be careful of lurkers or flank watchers each round.
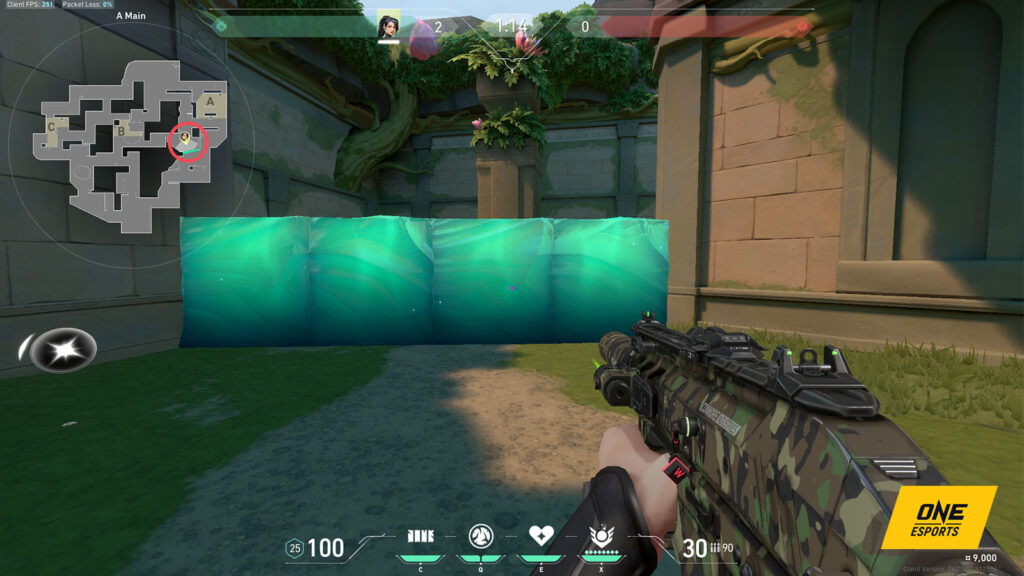
A Main
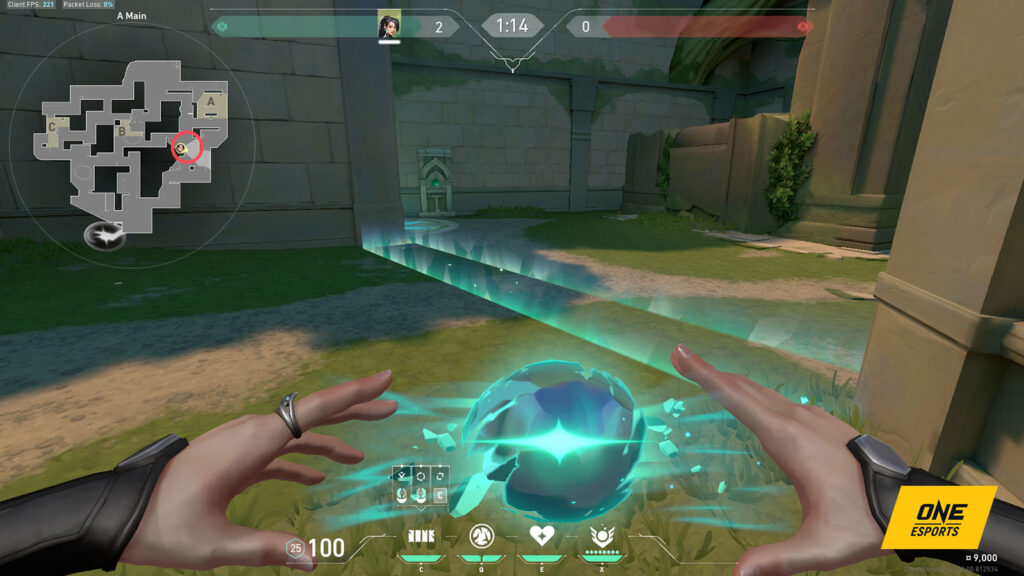
The A site has multiple entry points, but your primary focus should be A Main since it’s the most direct route onto site. Attackers can also get through the revolving doors, but you’ll know immediately if they activate the door.
At the start of the round, go into A Link and destroy the breakable wall leading to A Main. Hug the wall and position Sage’s Barrier Orb alongside A Door.

The wall will provide temporary cover if you wish to secure the ultimate orb at A Main and deny attackers looking to push into B site from A Link.
If the attackers decide to break your wall, throw Slow Orbs to delay their push further. Denying them entry to the site will give your teammates enough time to rotate from B and C.
B Main

If you’re holding the B site, the area you need to be most careful of is B Main. Once the Buy Phase barrier goes down, attackers are able to reach your doorstep in a matter of seconds, so it’s important that you not be caught off guard.
There are two spots to place a Sage wall in B Main — before the ultimate orb or after it. If there’s a Jett, Raze, or Neon on the opposite team, they can close the gap before you have time to put your wall up, so be careful.


If you’ve chosen to play it safe, wall the intersection of B Main and B site. That path is already narrow, so adding a Sage wall will make it more difficult for attackers to push into the B site. You can even throw Slow Orbs into the mix to delay them more.
C Main

C Main and C Lobby provide plenty of space for both teams to engage in long-range gunfights, with the large C Mound creating a partial cover for both teams.
Placing a Sage wall between the double-stacked box near C Door and the entrance of C Main will give you some space to work with.
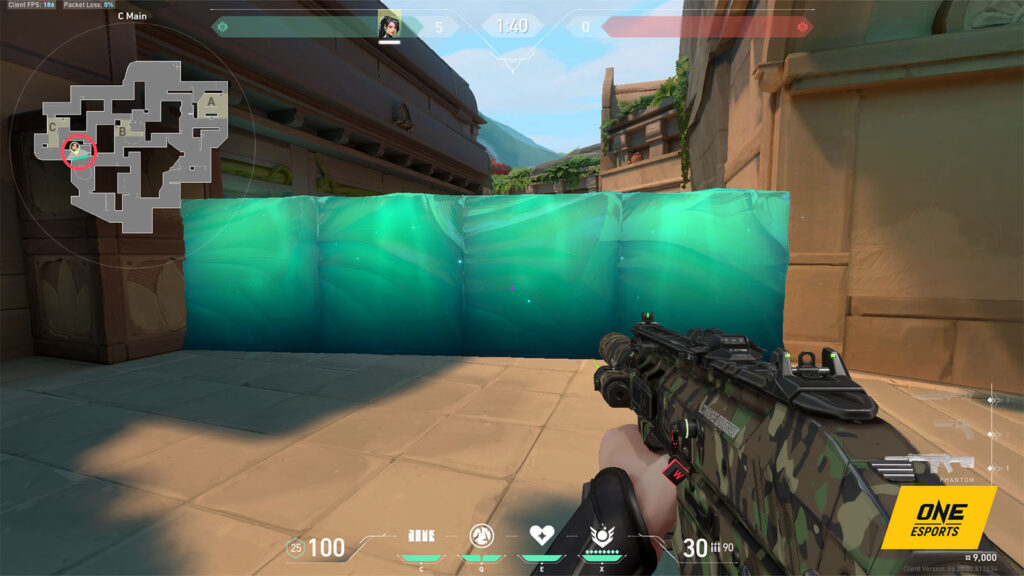
You can even set up a crossfire with a teammate holding C Main if you cross over to hide behind the double-stacked box. Even if the opponents open C Doors, they still need to go through your wall.
READ MORE: The best controllers to play on Lotus