Sova is one of the best Initiators for your Valorant team as long as you’re using his primary abilities, Recon and Shock Bolts, correctly. However, if you’re a Sova main, you might probably know how hard it is to remember the Recon and Shock Bolts lineups, especially for big maps like Ascent.
On top of that, mastering all Sova lineups requires several months of grind, which is a tedious task for an average Valorant player. Taking all these factors into account, we’ve compiled a list of some of the best and easiest Sova lineups for the Ascent map to help you rack up crucial information for your Valorant squad.
Best Sova lineups for defense on Ascent
From A-Heaven to A-Lobby
Gathering enemy location information is one of the primary objectives of every Sova player. Therefore, to kick things off, head to A-Heaven and stick to the corner behind the large box. Then, take out your recon dart and line up the two bounce bars right next to the A-short door, as shown in the above image. Finally, charge to two bars and then fire to gather reliable info about A-lobby.
From A-site to Mid and A-short
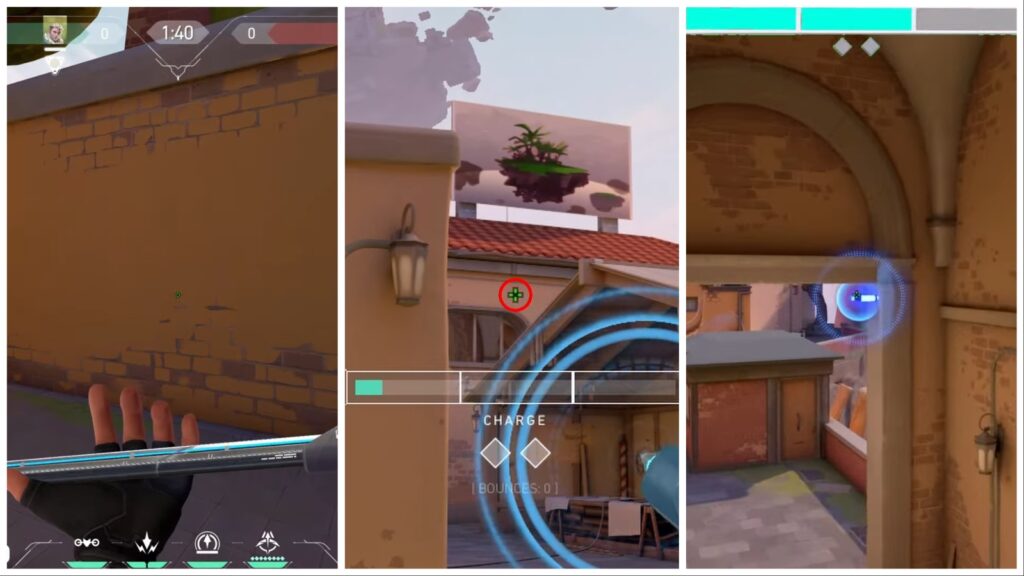
The next Sova defensive lineup will help gather information about the enemies at mid or rushing A-short, providing a significant advantage to your team playing at the tree. To use this lineup, stick right next to the green concrete box on the A-site and align the drone symbol with the box’s borders. Finally, charge to a single bar, add one bounce, and release the Recon dart.
From CT to Mid
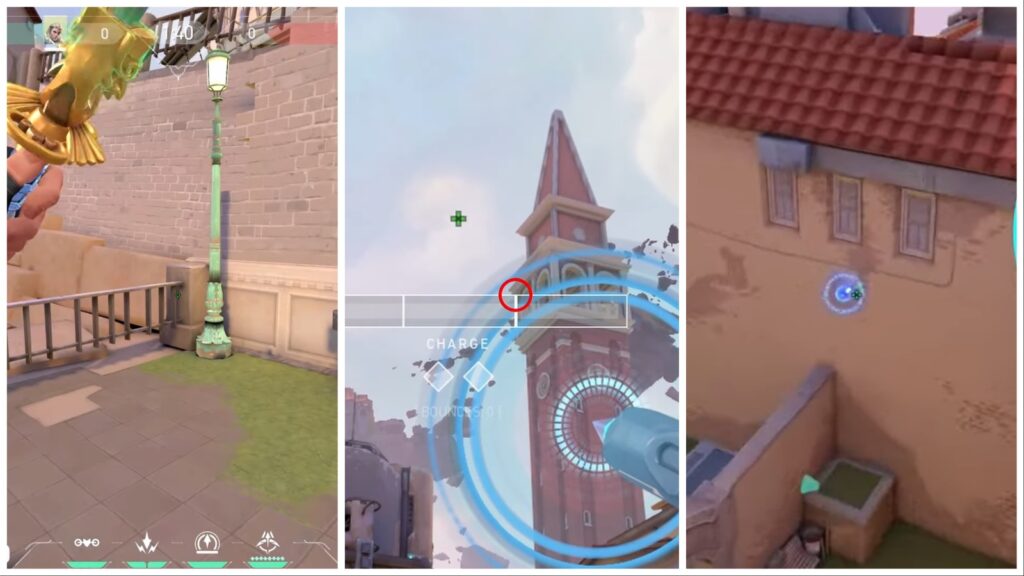
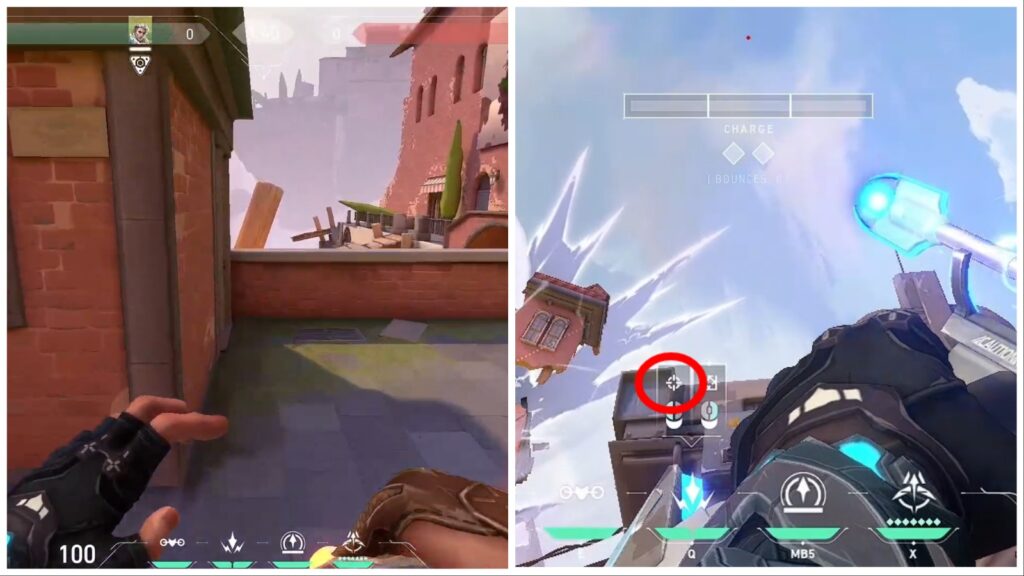
This Sova recon dart lineup is pretty useful during the mid-round to gather enemies’ information rotating from A to mid via the market door. As the lineup name suggests, head to the CT area first and stand at the left corner. The next step is to look at the sky and align your second charge bar with the clock tower between the two borders. The final step is to charge to a single bar and release the Recon dart without any bounce.
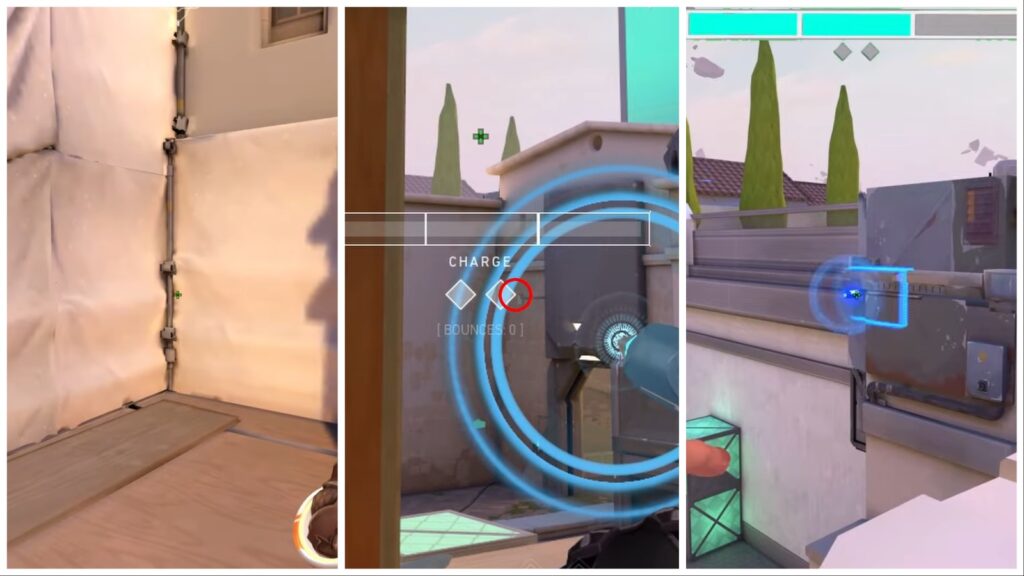
From B Site CT to B Lobby
To use this lineup, stand at the extreme left corner of the B-site CT area and place your right above the third portion of the window, under the small line. As always, make sure to check the above images for the exact recon dart positions. Finally, release the dart with two charge bars to scan for the enemies rushing the B-site. We highly recommend using this lineup during the early round when you’re playing at the B-site.
Best Sova lineups for attacking on Ascent
The famous Giraffe Recon Dart at B-site

This is, so far, the easiest and best Sova lineup on the attacking side of the Ascent map. To start off, stand at the extreme left of the B main entrance and aim your crosshair at the giraffe’s eye right above the market area. Then, fully charge the recon dart and release your mouse click to scan the area. This lineup is pretty helpful during B-rush as it scans plenty of crucial spots such as the market, door switch, and both the B-site lanes.
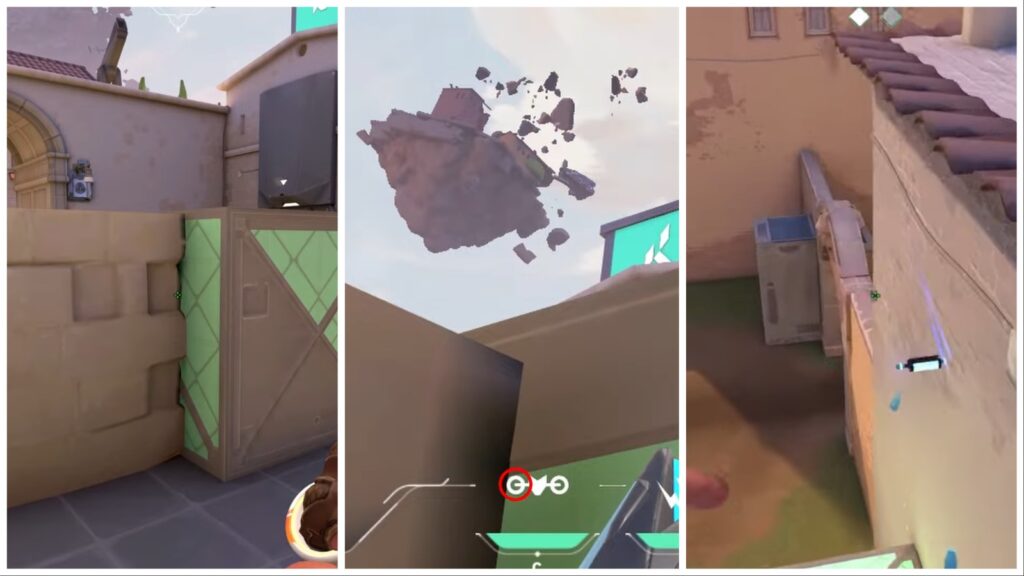
From A Main to close A-site

When it comes to the A-site while playing as attackers, it’s very crucial to clear the close angles, as your enemies typically camp close to the entrance with shotguns. To tackle this situation, line up your agent right behind the green box at the entrance and place your crosshair at the black rock on the top. Finally, throw the dart with a full charge, clearing all the vulnerable spots at the A-site.
Post Plant A-site

Apart from revealing the enemies’ location, you’ll also need to learn the post-plant Shock Dart lineups to secure crucial rounds without showing off your face at the site. To start off, stand right next to the green box at the A-lobby and aim your second bounce bar at the cloud’s tip. Finally, throw the shock dart with full charge without any bounce to take out the opponent defusing the spike at the default location.
Post Plant B-site
For the B-site post-plant situation, head to the B entrance and stand right next to the small hut. Then, aim at the sky and line up the shock dart right, aligning the symbol with the border, as shown in the above image. The last step is to fully charge your shock dart and throw it to tackle the default spike plant situation at the B-site.
READ MORE: Take your Operator skills to the next level with Wardell’s Sage wall play on Ascent