Setting up a dedicated server for V Rising is required to ensure the game world remains accessible to everyone, even when you’re not in the game.
To do this effectively, it’s essential to familiarize yourself with the V Rising dedicated server settings and how to configure them.
V Rising allows players to set up their dedicated servers for the game while having their own official servers.
While most people prefer playing it offline or on official servers, if you are a group of friends playing the game or a content creator, hosting a dedicated server for V Rising will allow you to play together and even progress without depending on the host to be online.
So, if you have started setting up your V Rising dedicated server but don’t know about the different server settings, keep reading our guide.
V Rising dedicated server settings
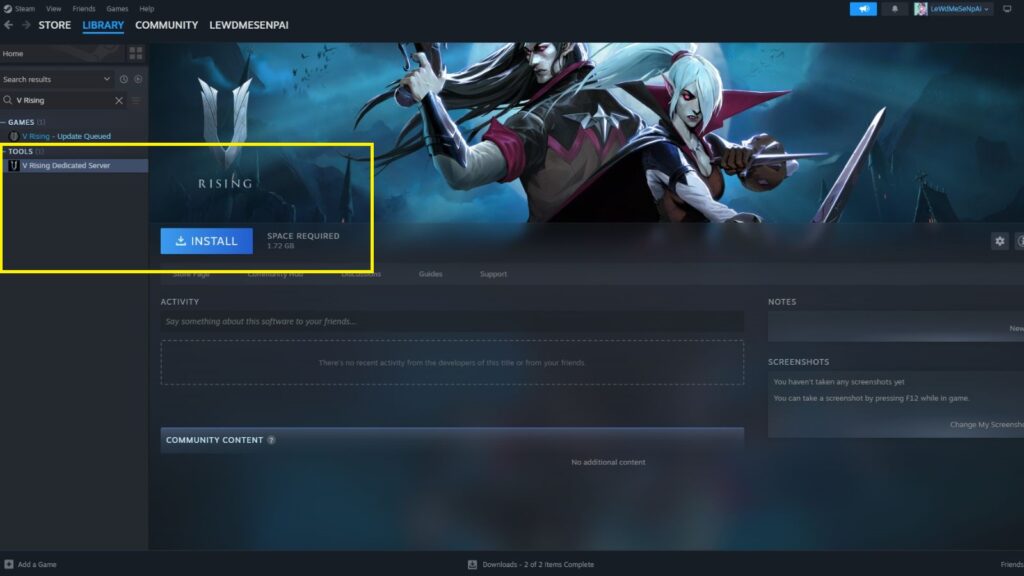
Assuming you have already rented a server from third-party service providers like G Portal or are using the SteamCMD to use your PC as the dedicated server, the first step is to install the V Rising Dedicated Server application from Steam.
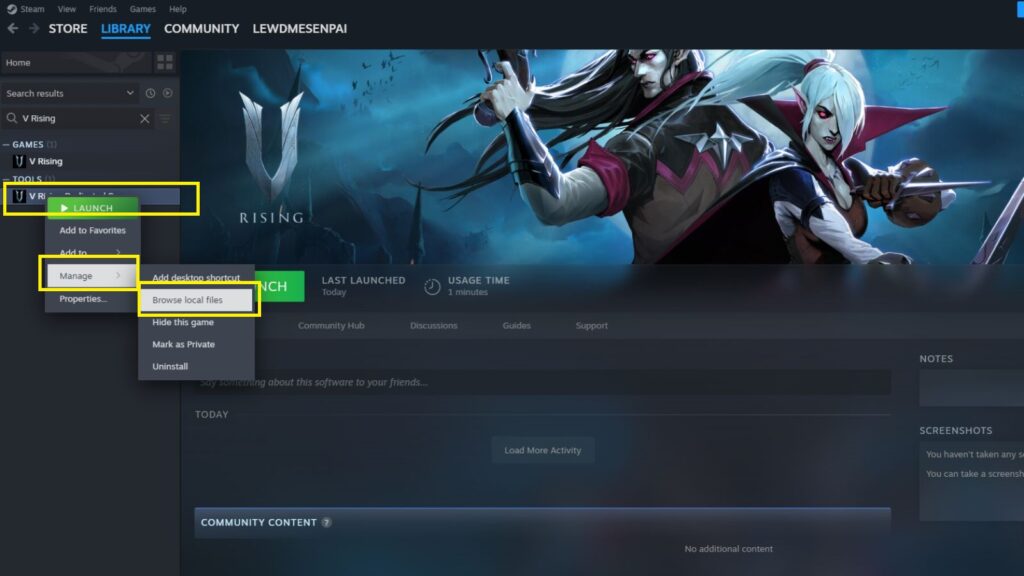
Once you do that, right-click on it to open the drop-down menu, hover over the Manage option and select “Browse local files.”
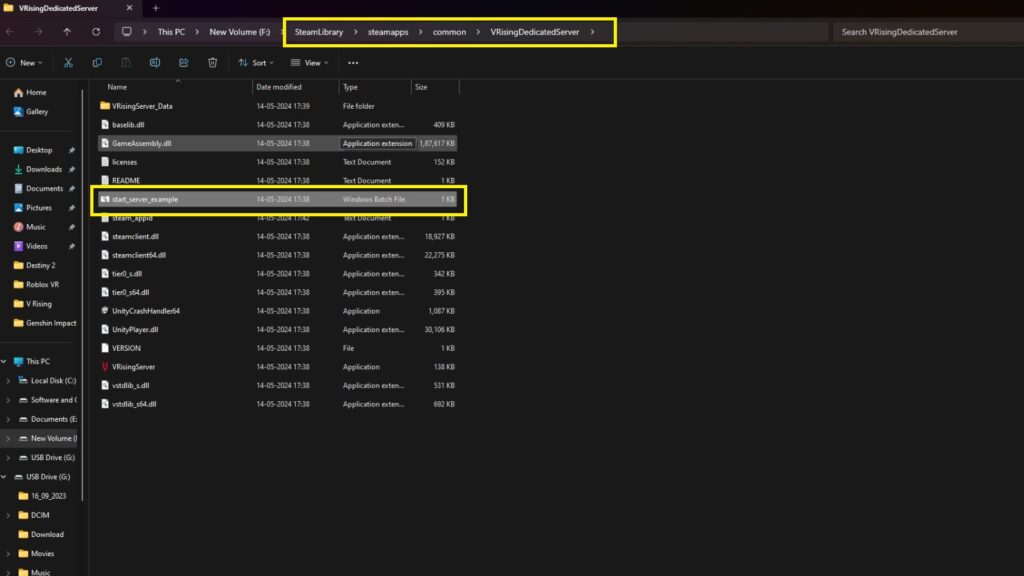
Open the batch file “start_server_example.bat” using a file editor like Notepad and edit the following attributes:
- –serverName: Use anything you like. Make sure to note it, as you will need it later.
- -saveName: Use a save name that will appear in your save files.
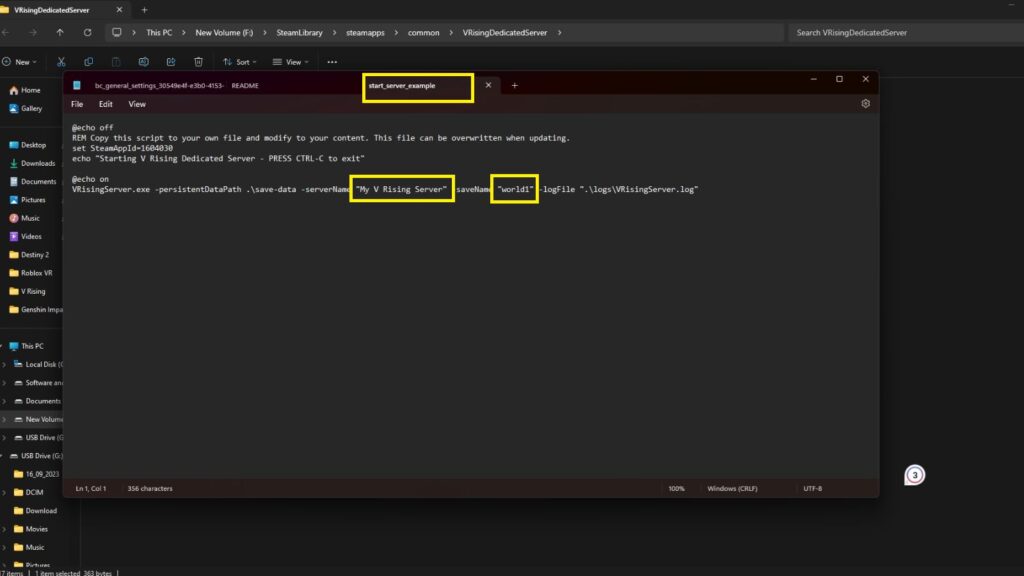
After the above changes are made, save the “start_server_example.bat” file and rename it to ensure it doesn’t get overwritten whenever the game receives a new update.
If you don’t know what name to use, we recommend keeping it as simple as “start_my_server” and saving it. Now comes the main server setting part, where you must edit four important server files:
- ServerGameSettings.json: You can alter game world settings in this file.
- ServerHostSettings.json: As the name suggests, you can change server and host settings in this file.
- adminlist.txt: A file used to set up admins for your server.
- banlist.txt: A file used for applying manual bans.
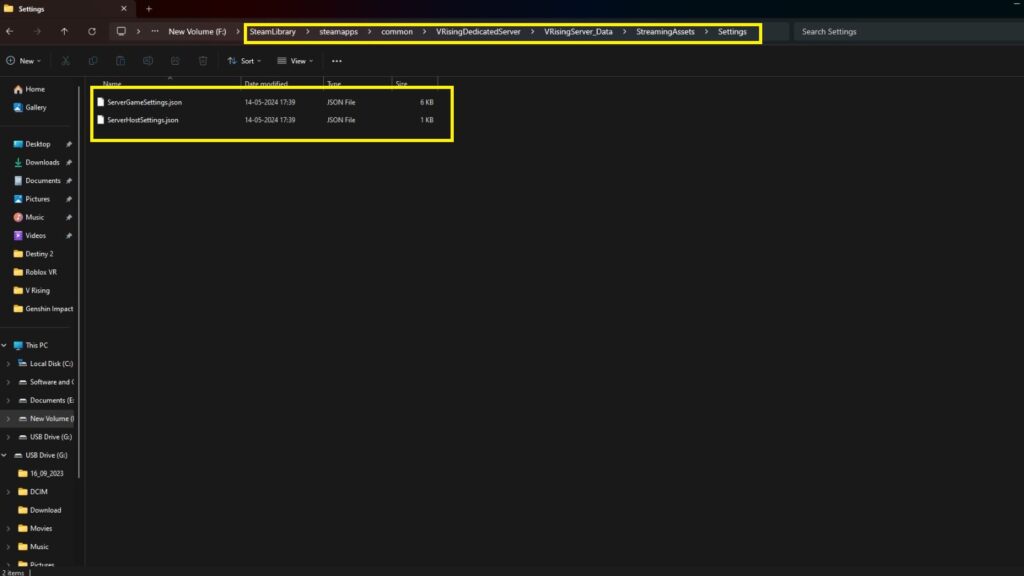
To access the ServerGameSettings and ServerHostSettings files, navigate to the Settings folder via VRisingServer_Data > StreamingAssets > Settings.
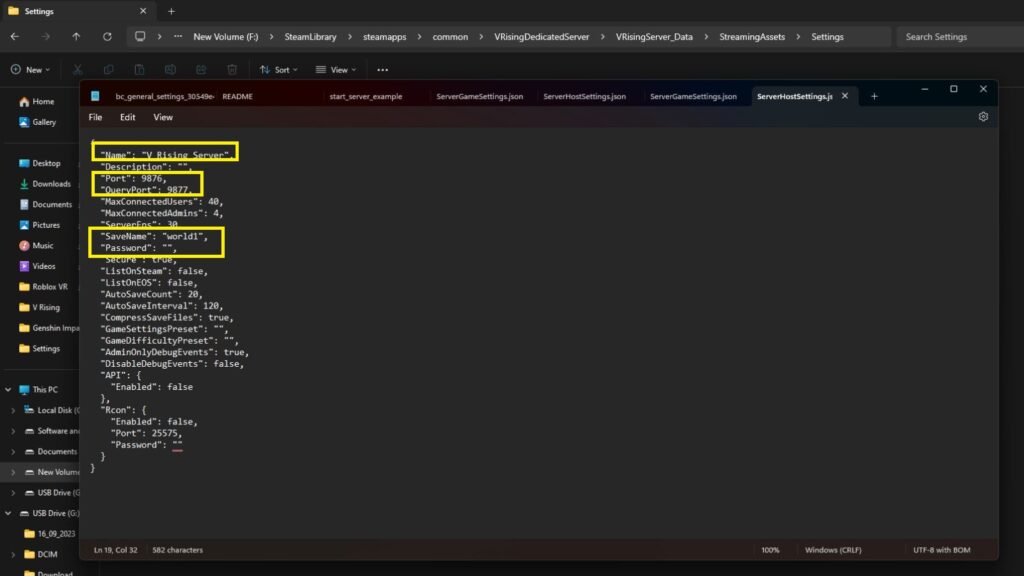
After that, open the ServerHostSettings.json file using the text editor, change the server name and save the name to the one you used before while noting the “Port” and “QueryPort” as you need them for Port Forwarding and for setting up the Firewall settings to ensure the incoming connection is not blocked.
You can add your server description, joining password, user limit, and other information in the same file. That sums up every V Rising server setting you have to set up to run your dedicated server.
The next step is to launch the first batch file to make your server live and open your router settings via the Default Gateway to set up Port Forwarding.
Lastly, if you want to change the game world settings for your server, you can edit the “ServerGameSettings.json” file and change the game mode type and other settings according to your preference.
If you need help setting up the values for the respective attribute, check out this PDF file from the developers which explains all available commands, values and what they do.
READ MORE: V Rising release date: Play as a vampire in this new survival action RPG

